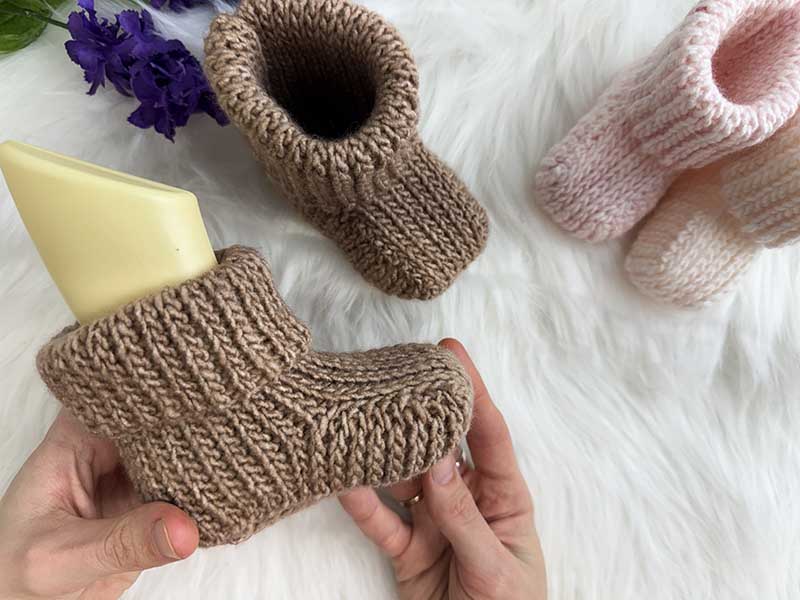
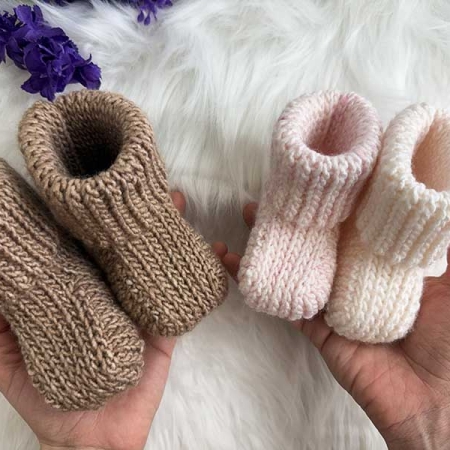
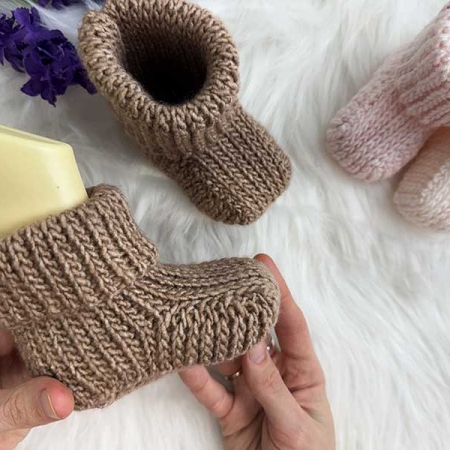
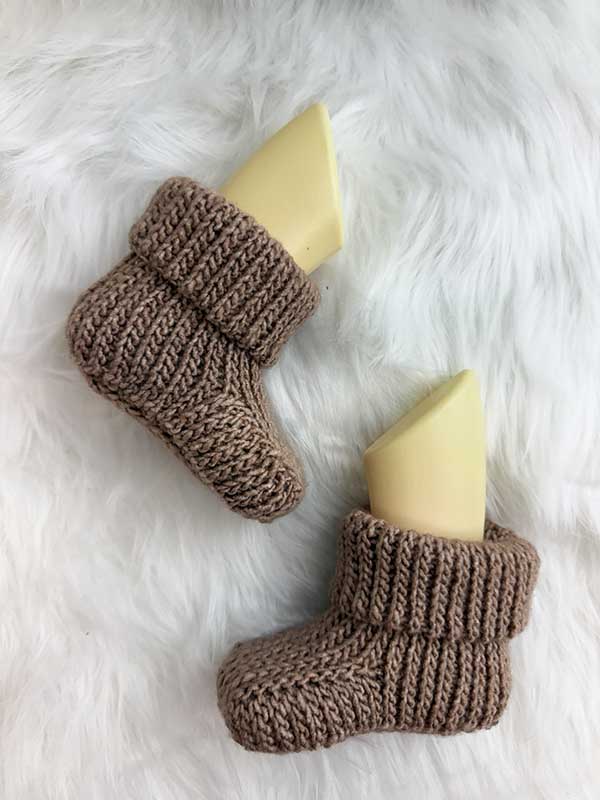
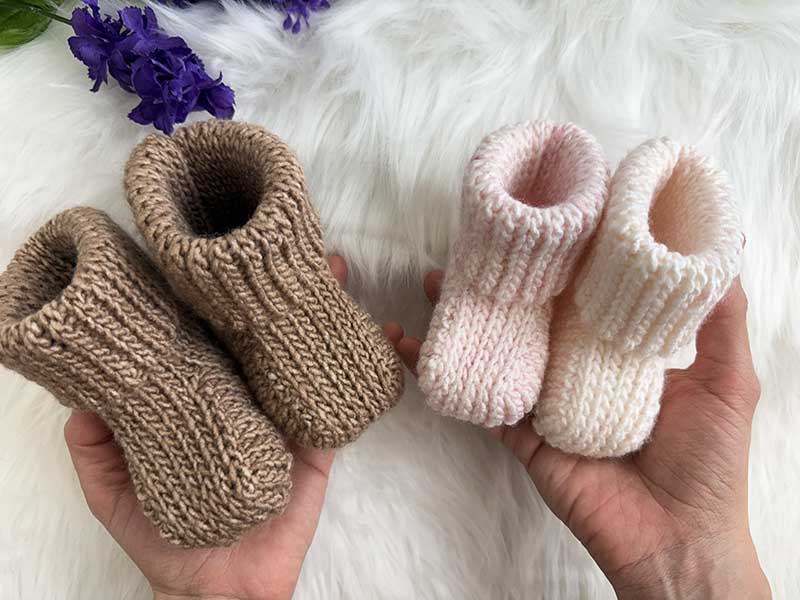
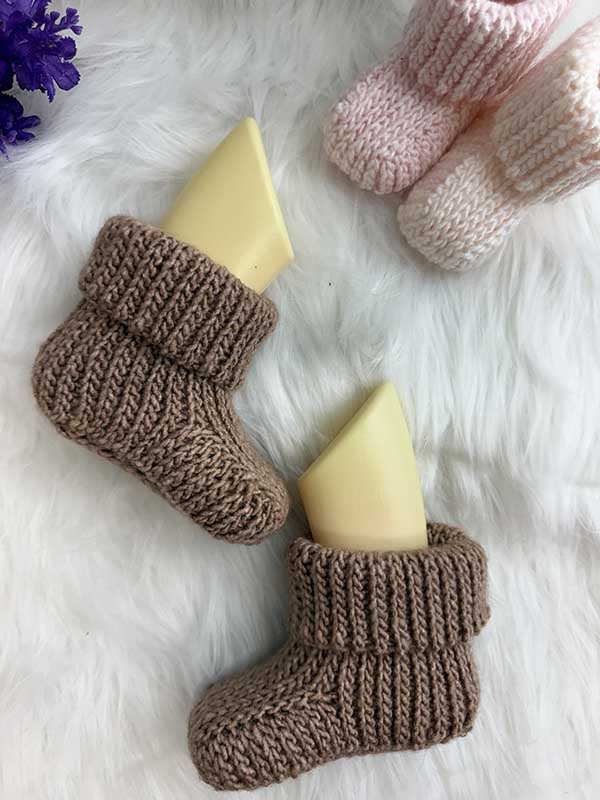
Crochet Ribbed Baby Booties Pattern
Pattern Sections
Crochet materials and tools:
Crochet hook 4.5 mm (for the booty) and 2.5 mm (for the seam).
Knit It, Multitone Yarn Jumbo (DK) – 100 % acrylic, 380m/150g skein. The yarn must be soft.
Alternatively, use yarn with approximately 80–150 m per 50 g ball (or 160–300 m per 100 g) and adjust the pattern according to your measurements. Choose a very soft yarn.
Stitch markers.
Crochet ribbed baby booties size:
| Age (month) | Baby Height | Sole Length | Sole Width | Toe Wall Height | Cuff Height |
| 0-3 | 56-62 | 7.5 | 4 | 3 | 13-15 |
| 3-6 | 62-68 | 8.5 | 4.5 | 3 | 14-16 |
*All measurements are in centimetres unless otherwise mentioned.
Size 3-6 measurements are mentioned after a forward slash (/…) in the pattern description.
This pattern includes instructions for sizes 0–3 months and 3–6 months. By following the provided measurements and guidelines, you can adjust the size if necessary.
I recommend crocheting the booties simultaneously — work one sole, then the second sole, then continue with the next part on each bootie. This is especially helpful for beginners, as gauge can vary from day to day and working them this way helps ensure both booties turn out the same size and shape.
Gauge: 18-20 sts = 10 cm (4”)
If your gauge is different, adjust the stitch count as needed, following the given measurements.
Common abbreviations of crochet stitches (US):
Ch – chain
Sl st – slip stitch
Sl st BLO – Slip stitch back loop only
Sl st FLO – Slip stitch front loop only
St(s) – stitch(es)
Yo – yarn over
Ribbed baby booties crochet pattern:
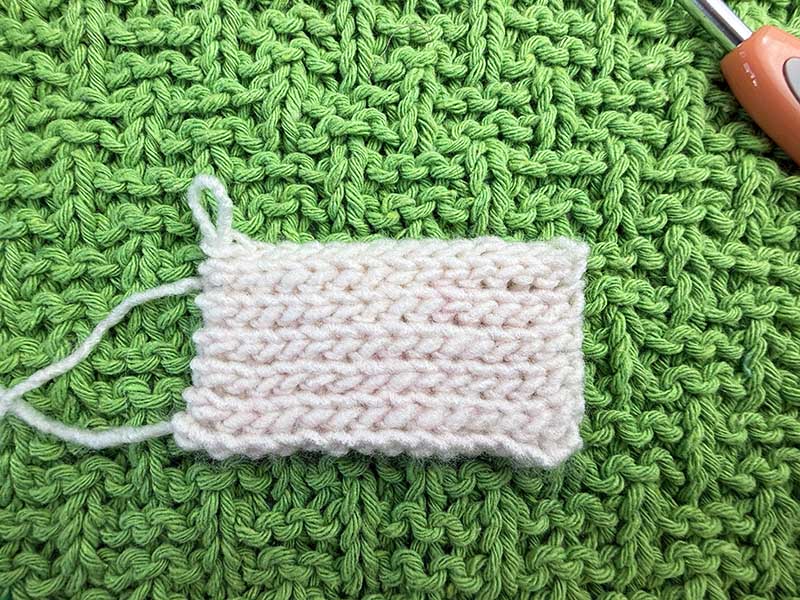
Part 1: The Sole
Foundation: Slip knot. Ch 14. (Ch 16)
Row 1: ch 1. Start in the 2nd chain from the hook. Sl st loosely in each chain Turn. (14/16).
Row 2: Ch 1. Sl st BLO in each stitch. Turn. (14/16).
Rows 3–11: Ch 1. Sl st BLO in each stitch. Turn. (14/16).
Row 12: (for the size 3-6 only): Ch 1. Sl st BLO in each stitch. Turn. (16)
Gently stretch the sole before measuring. The sole should measure 4 cm for size 0–3 months and 4.5 cm for size 3–6 months. Add more rows if needed.
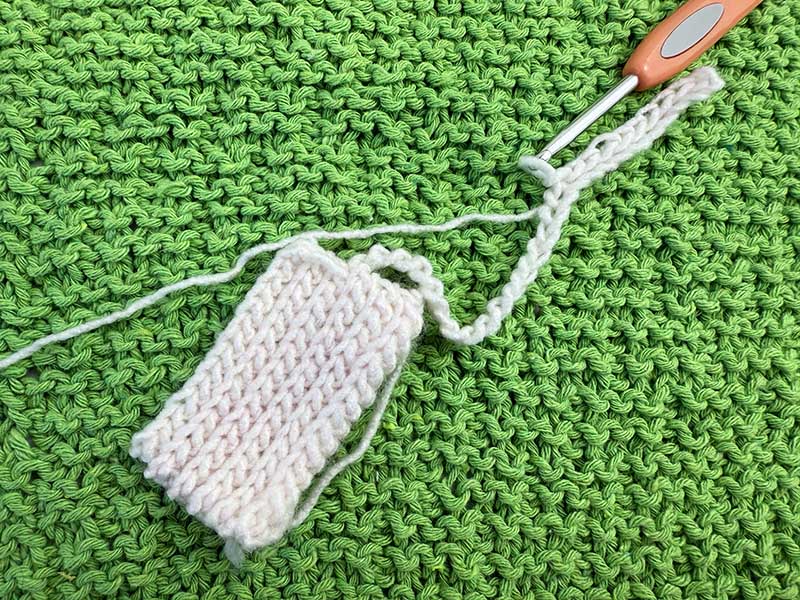
You may cut the yarn here and attach it again in the middle of the sole. Or, instead of cutting, pull up a large working loop, pass the sole through the loop, and tighten the working yarn to secure it.
Part 2: Cuff — Side 1
Look at the sole; you will see the V-shaped chains. Count them along the short side of the sole.
Size 0–3 months: The number of V-chains is odd (5), attach the yarn into the center of the 3rd chain.
Size 3–6 months: The number of V-chains is even (6), so attach the yarn into either the 3rd or 4th chain (near the center).
Ch 25 (27).
Row 1 (Down): Ch 1. Start in the 2nd chain from the hook. Sl st in each ch across. Sl st into the next V‑ch on the edge of the sole to join. Turn. (25/27)
Row 2 (Up): Ch 1. Skip the last slip stitch. Sl st BLO in each st across. Turn. (25/27)
Row 3 (Down): Ch 1. Sl st BLO in each st across. Sl st into the next V‑ch on the edge of the sole to join. Turn. (25/27)
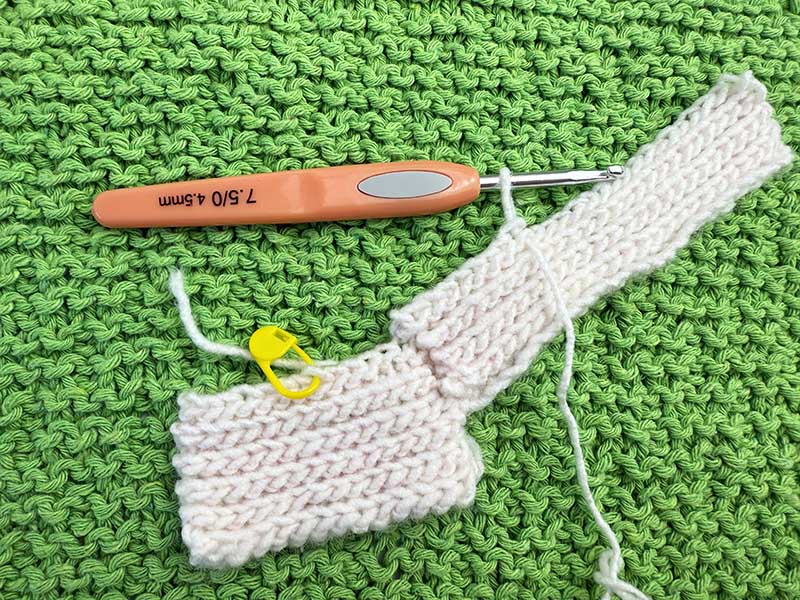
Repeat Rows 2 and 3. Continue until you have worked in each V‑ch along the short sole edge.
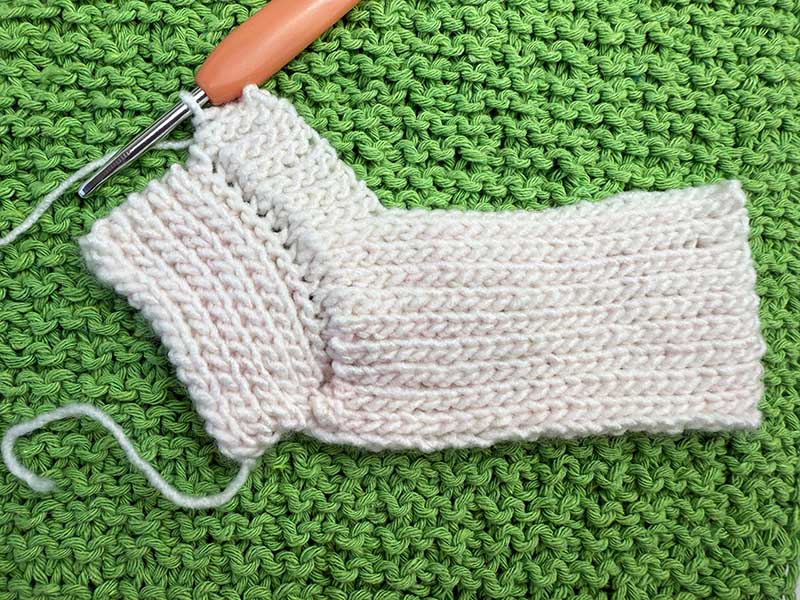
Divide the sole along the long side in half: for the smallest size, 7 sts and 7 sts. Count from the last row and place a stitch marker into the 7th st (see picture).
For size 3–6 months, leave more sts for the toe and fewer for the heel (9 sts and 7 sts). Count from the last row and mark the 7th st as well.
Continue repeating Rows 2 and 3 in each of the sts up to the stitch marker. Make join into the next stitch on the sole edge.
When you reach the st with the stitch marker, make a join and repeat Rows 2 and 3 once more.
Part 3: Toe — Side 1
Make a slip stitch into the next stitch on the sole.
Row 1 (Up): Ch 1. Skip the last slip stitch. Work sl st BLO in the next 4 sts only. Turn.
Row 2 (Down): Ch 1. Work sl st BLO in the next 4 stitches. Join with sl st into the next stitch on the sole edge. Turn.
Continue repeating Rows 1 and 2 (4 stitches long) until you have worked along the next 7/9 stitches of the sole.
When you reach the last st, make a join and repeat Rows 1 and 2 once more.
Part 4: Front Part
Sl st into the center of the 1st V-ch, turn.
Row 1: Ch 1. Skip the last slip stitch. Sl st BLO in next 4 sts. SL st in next 7/9 sts along the edge of the previous part (work in each V-ch or between them). Sl st BLO in next 21/23 sts along cuff. Turn. (32/34)
Row 2: Ch 1. Sl st BLO in next 32/34 sts. Sl st into the next V‑ch on the short edge of the sole to join. Turn.
Row 3: Ch 1. Skip the last slip stitch. Sl st BLO in next 32/34 sts. Turn.
Row 4: Ch 1. Sl st BLO in next 32/34 sts. Sl st into the next V‑ch on the short edge of the sole to join. Turn.
Repeat Rows 3 and 4. Continue until you have worked in each V‑ch along the second short sole edge.
Divide the sole as before: count from the last Row and place a stitch marker in the 7th/9th st.
When you reach the last V-ch, make a join and repeat Rows 3 and 4 once more.
Part 5: Toe — Side 2
Sl st into the first side st. Turn.
Row 1: Ch 1. Skip the last slip stitch. Sl st BLO in next 4 sts. Sl st FLO in next st. Turn.
Row 2: Ch 1. Skip the last slip stitch. Sl st BLO in next 4 sts. Join with sl st into the next stitch on the sole edge. Turn.
Continue repeating Rows 1 and 2 in each of the sts up to the stitch marker.
When you reach the st with the stitch marker, make a join and repeat Rows 1 and 2 once more.
Part 6: Cuff — Side 2
Sl st into the next stitch on the sole.
Row 1 (Up): Ch 1. Skip the last slip stitch. Sl st BLO in each st across. Turn. (25/27)
Row 2 (Down): Ch 1. Sl st BLO in each st across. Sl st into the next st to join. Turn. (25/27)
Continue repeating Rows 1 and 2 in each st along the side sole. When you reach the heel section, repeat Rows 1 and 2, making joins in the remaining V-chs. Work the final Row down and join with a Sl st to the beg V-ch.
Assembly:
Turn the bootie right side out. Using a smaller size hook, fold the bootie so the foundation ch is closer to you and the last Row is further from you. Place the working yarn inside the sock.
* Insert hook from front to back into a st of the foundation ch, then insert hook from back to front under the back loop of the corresponding st on the opposite side. Yo and pull through all 3 loops on the hook.
Repeat from * across. Cut yarn and weave in all ends. Repeat for the second bootie.


Hi there, when the pattern states BLO, does it have a working side and a right side or is the back loop always the furthest one when viewed from the front once the work is turned? Seems like no matter what I do, my work doesn’t look like the photos.
whichever side it is on, it will be always loop further away from you