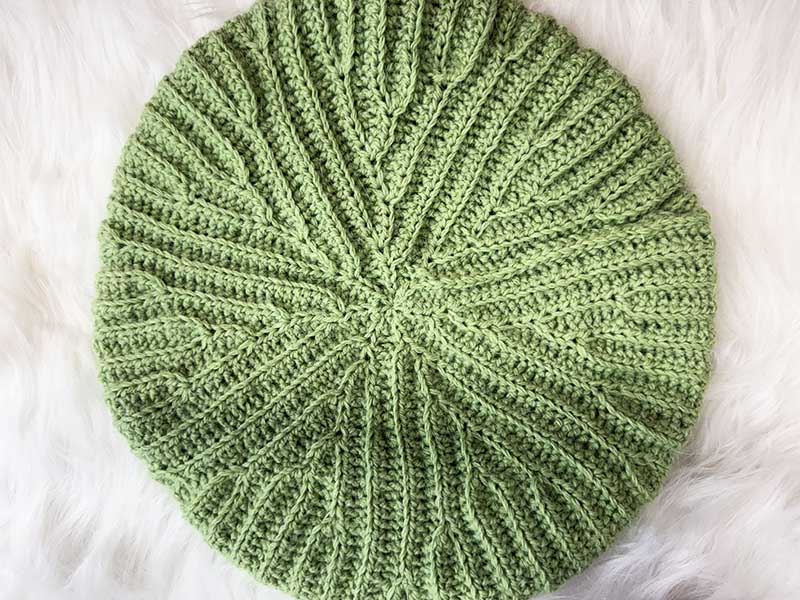
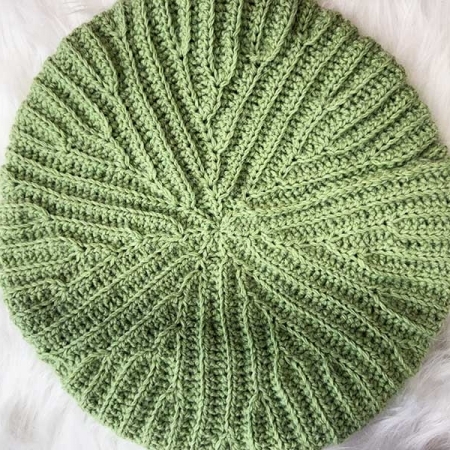
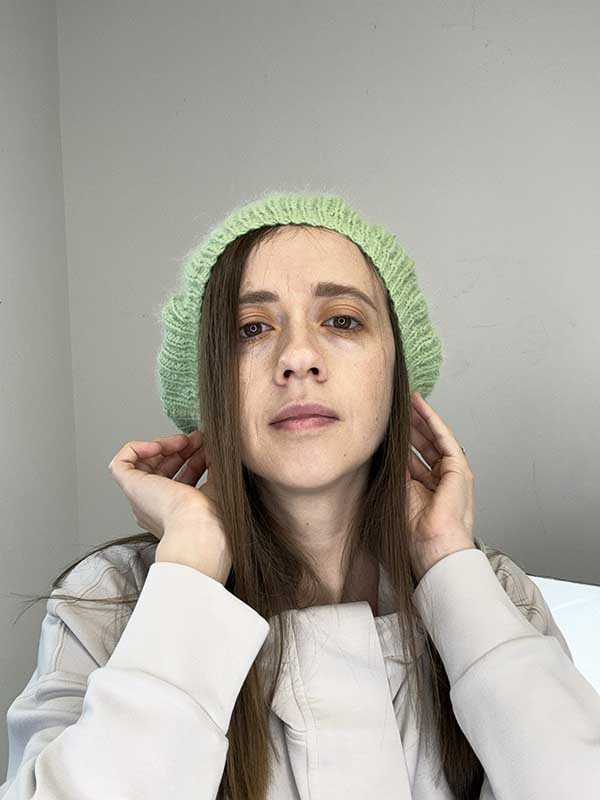
Crochet French Beret Pattern
Pattern Sections
Crochet materials and tools:
Crochet hook 3.5 mm. If your gauge differs, use a 3 mm or 3.75 mm hook to adjust. Use a 2.5 mm crochet hook for the beginning chain and for seaming.
Long mink wool (Cashmere) yarn – 75% wool, 25% nylon: 50 grams – 338 m per skein. Note: Knit with 2 strands of main and 1 strand of reinforcing (partner) yarn together.
If you cannot find the aforementioned yarn, use any yarn with approximately 100–125 m per 50 g ball.
Yarn needle. Optionally: 0.6 mm fine elastic thread for sewing machine.
Crochet French beret size:
Head circumference (one size): 56-60 cm (21-23 in)
Gauge: 22 sts x 16 rows – 10 cm (4 in)
Swatch worked with RS rows in HDC BLO and WS rows in yo sl st BLO.
Common abbreviations of crochet stitches (US):
ch – chain
HDC – half double crochet
sl st – slip stitch
Yo – yarn over
Yo sl st – Yarn Over Slip Stitch: Yarn over and insert the hook into the next stitch. Yarn over again and pull up a loop (you now have 3 loops on the hook). Pull the first loop through the other two loops on the hook in one motion, just like a regular slip stitch.
BLO – back loop only
st(s) – stitch(es)
French beret crochet pattern:
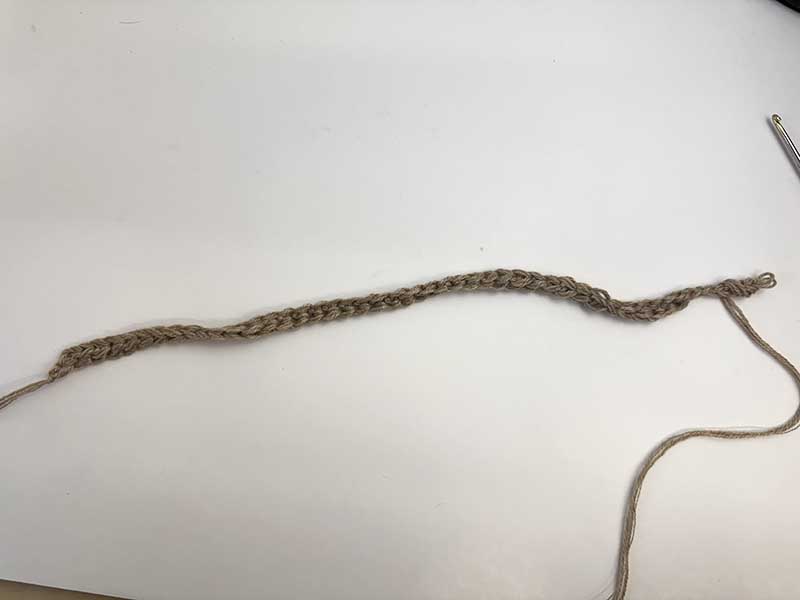
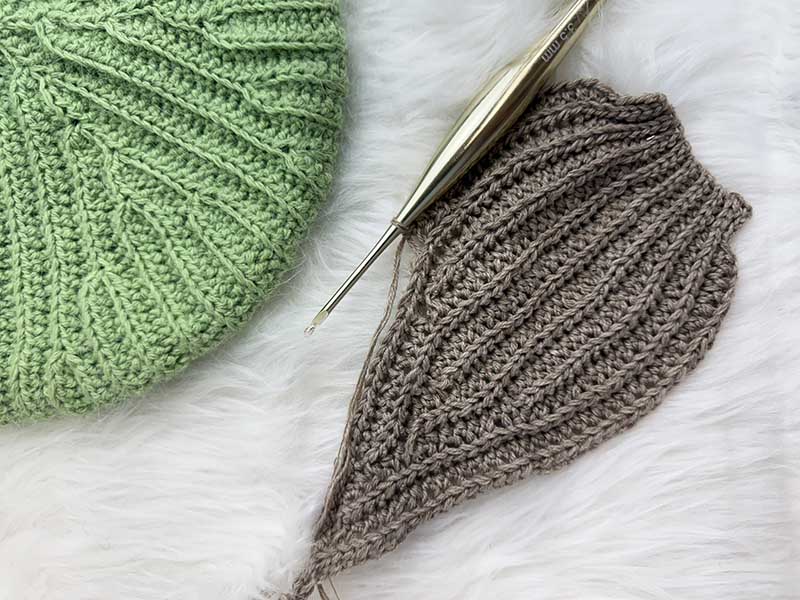
We start with a chain, but this is not a standard foundation chain. The next stitches are worked into the drawn-up loop from the previous stitch. Follow the steps below, or check the video tutorial for a visual demonstration.
Row 1:
-
-
- Using a smaller size hook, ch 2.
- Yarn over.
- Insert hook into the 1st ch.
- Yo, pull up a loop (make it a bit tall). You have 3 loops on the hook. Tip: hold the loop with your fingers so you don’t miss it.
- Yo and pull through all 3 loops. Stitch 1 is done.
- Yo.
- Insert the hook into the drawn-up loop from the previous stitch – step 4.
- Yo, pull up a loop (make it a bit tall). You have 3 loops on the hook.
- Yo and pull through all 3 loops. Next stitch is done.
- Repeat Steps 6-9 until you have 42 sts total.
-
The chain should measure approx. 21–25 cm (8–10 in).
Next, make 6 regular chains. Switch to the larger hook.
Row 2: Start in the 2nd ch from the hook. Sl st in the back ridge of the next 5 chains. HDC BLO in next 36 sts. Leave 6 sts unworked. Turn. (41)
Row 3: Ch 1, yo sl st BLO in next 36 sts. Sl st BLO in next 5 sts. Turn. (41)
Row 4: Ch 1, sl st BLO in next 5 sts, HDC BLO in next 20 sts. Turn. (25)
Row 5: Ch 1, yo sl st BLO in next 20 sts. Sl st BLO in next 5 sts. Turn. (25)
Row 6: Ch 1, sl st BLO in next 5 sts, HDC BLO in next 28 sts. Turn. (33)
To create a smooth transition between short rows and avoid holes, there are two ways to do this:
Method 1:
Bring the working yarn to the right side. Insert the hook through both loops of the bottom stitch on the back side, yarn over, then insert the hook into the back loop of the next stitch. Yarn over, pull through, yarn over again, and pull through all loops on the hook to complete an HDC. See the video tutorial at 23:54.
Method 2:
Yarn over, insert the hook into the back loop of the next stitch, then immediately insert the hook from front to back through the long vertical loop between the last 2 rows. Yarn over and pull through both loops (the vertical loop and the back loop), yarn over again, and pull through all loops on the hook to complete an HDC. See the video tutorial at 16:24.
Row 7: Ch 1, yo sl st BLO in next 28 sts. Sl st BLO in next 5 sts. Turn. (33)
Row 8: Ch 1, sl st BLO in next 5 sts, HDC BLO in next 24 sts. Turn. (29)
Row 9: Ch 1, yo sl st BLO in next 24 sts. Sl st BLO in next 5 sts. Turn. (29)
Row 10: Ch 1, sl st BLO in next 5 sts, HDC BLO in next 32 sts. Turn. (37)
Row 11: Ch 1, yo sl st BLO in next 32 sts. Sl st BLO in next 5 sts. Turn. (37)
Row 12: Ch 1, sl st BLO in next 5 sts, HDC BLO in next 20 sts. Turn. (25)
Row 13: Ch 1, yo sl st BLO in next 20 sts. Sl st BLO in next 5 sts. Turn. (25)
Row 14: Ch 1, sl st BLO in next 5 sts, HDC BLO in next 38 sts. Turn. (43)
Row 15: Ch 1, yo sl st BLO in next 38 sts. Sl st BLO in next 5 sts. Turn. (43)
Row 16: Ch 1, sl st BLO in next 5 sts, HDC BLO in next 15 sts. Turn. (20)
Row 17: Ch 1, yo sl st BLO in next 15 sts. Sl st BLO in next 5 sts. Turn. (20)
Row 18: Ch 1, sl st BLO in next 5 sts, HDC BLO in next 42 sts. Turn. (47)
Row 19: Ch 1, yo sl st BLO in next 42 sts. Sl st BLO in next 5 sts. Turn. (47)
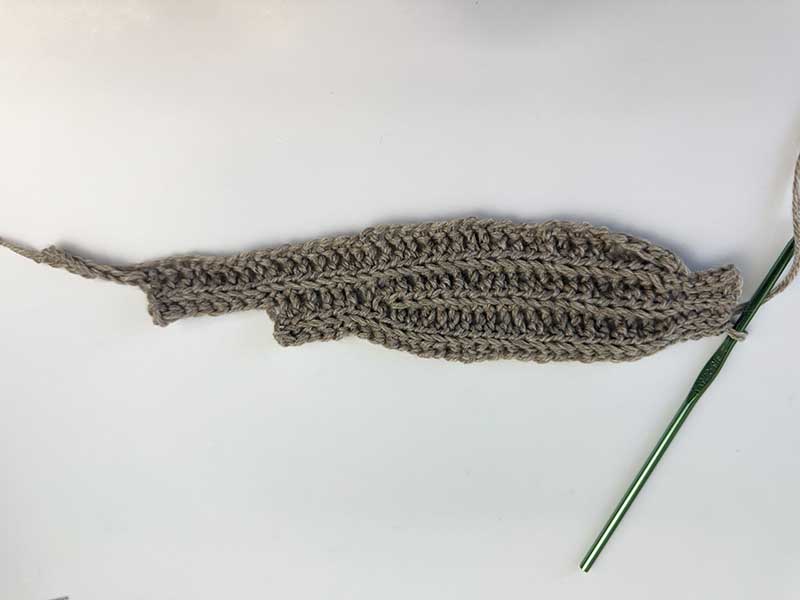
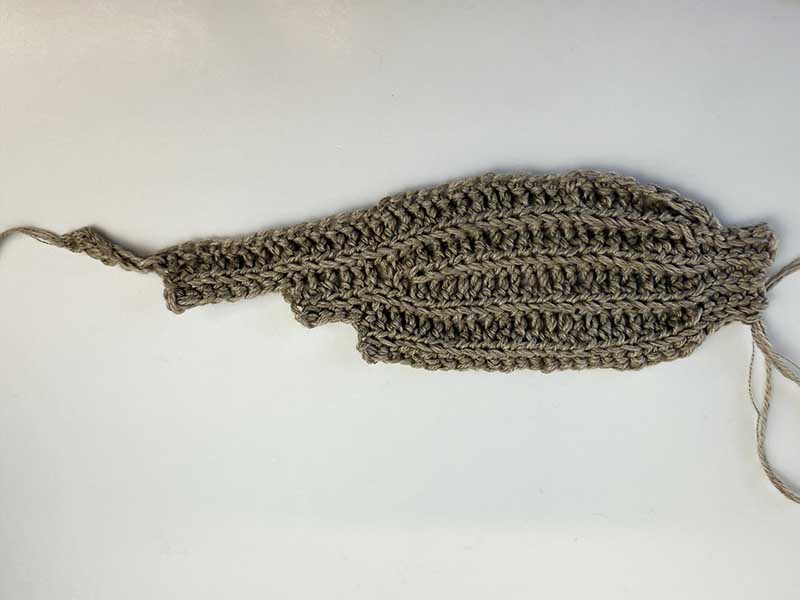
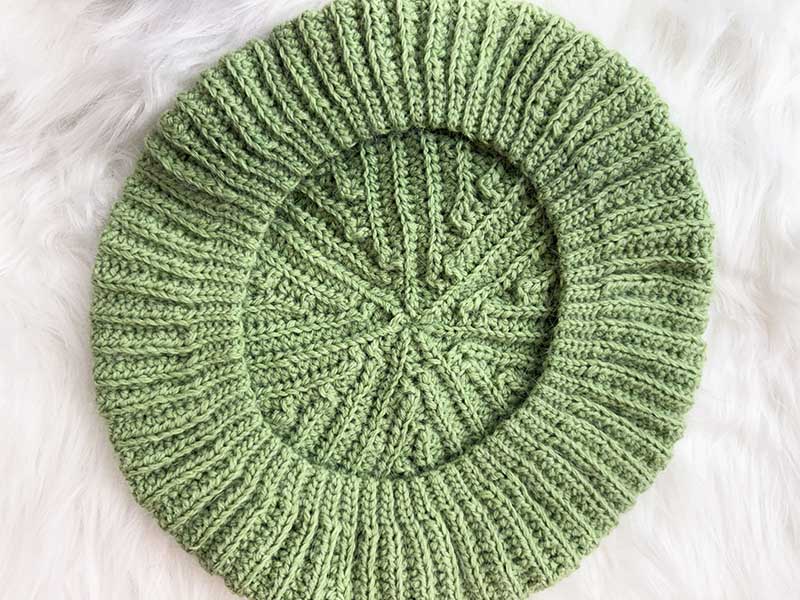
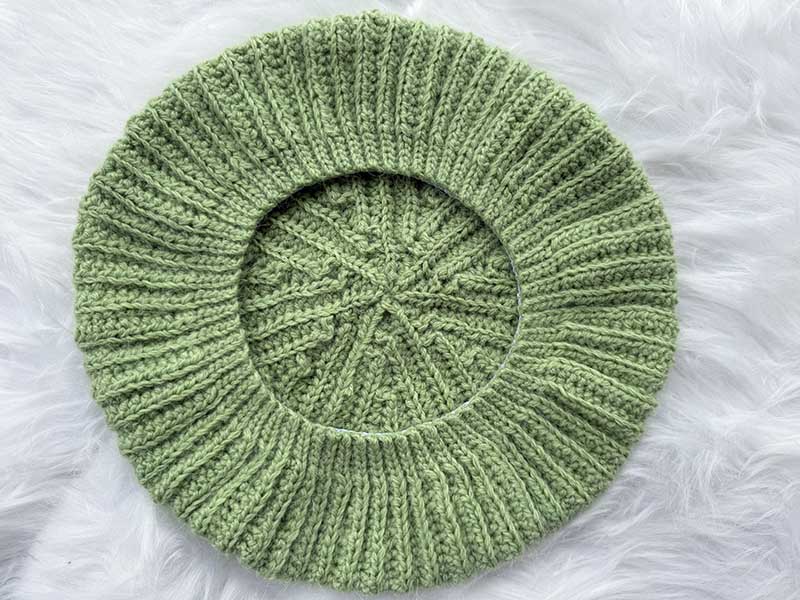
The first beret section is complete. Repeat Rows 2-19 five more times. Then repeat Rows 2-17 one time. You will have 7 sections total.
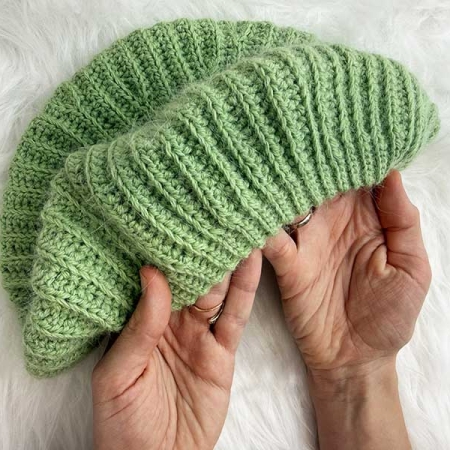
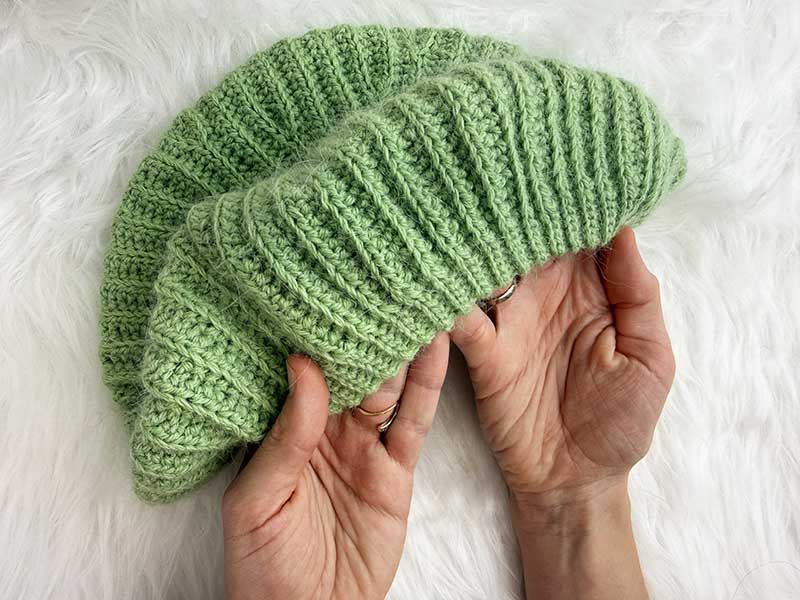
Assembly: Switch to a smaller hook size. Ch1. Turn the beret right side out. Fold it so the foundation chain edge is closest to you, and the last row and the working yarn are farther from you. Make sure the working yarn is coming from the inside of the folded beret (not the outside).
*Insert the hook from back to front through the back loop on the stitch on the far edge, then insert the hook into the front loop of the stitch on the near edge. Yarn over and pull through all loops on the hook – repeat from * across the short ribbing edge.
Join the main part of the beret: Move the working yarn to the right side of the piece. **Insert the hook into the single loop of the stitch on the near edge, then insert the hook from front to back through the back loop of the stitch on the far edge. Yarn over and pull up a loop through the far edge back loop only, yarn over and pull through all 3 loops on the hook – repeat from ** across.
Cut the yarn, leaving a 10-15 cm (4-6 in) tail. Using a yarn needle, close the crown hole by picking up stitches along the longest rows (7 total). Pull gently to tighten and close the crown, being careful not to break the yarn. Weave in all ends.
If you find that your beret is slightly too big, don’t worry, there’s an easy fix. Using a 0.6 mm fine elastic sewing thread, you can adjust the fit to suit almost any size. You can find a video tutorial showing how to insert the thread on my blog or Instagram page.
See the photos below showing the beret without and with the elastic thread.


Leave a Reply
Want to join the discussion?Feel free to contribute!