
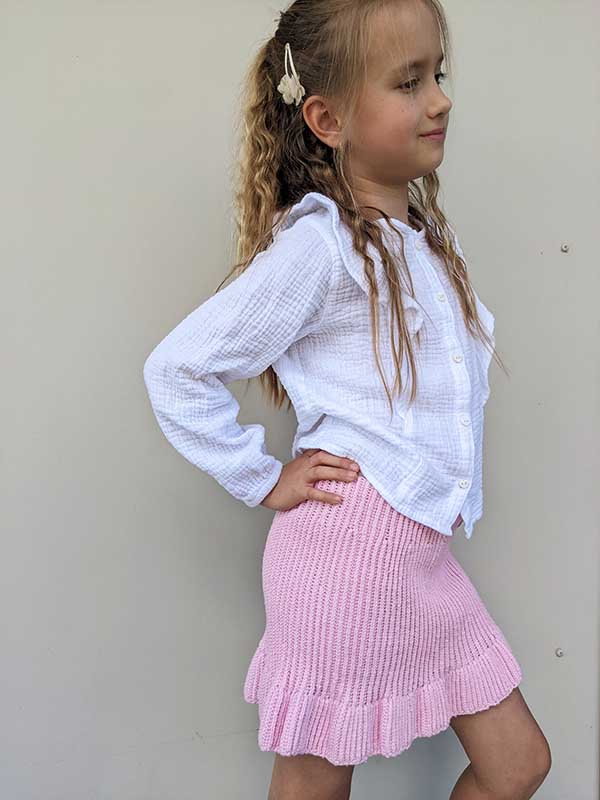
Crochet Summer Skirt Pattern for Girls
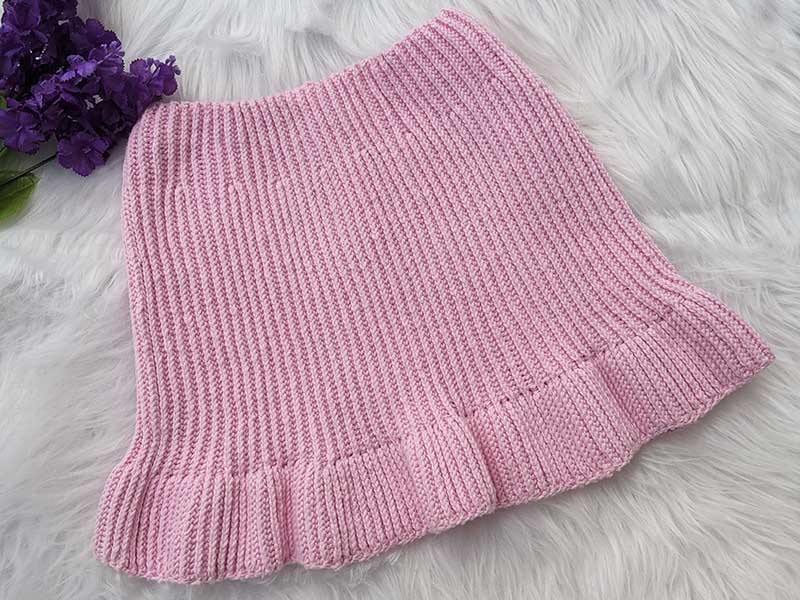
Crochet materials and tools:
Crochet hook 2.5 mm or the hook that will fit the yarn.
Hobbii, Rainbow 8/4, (1) –170 meters per 50 grams ball, 100% cotton. Quantity: 250 grams for the given example.
Stitch markers. Optionally: 0.6 mm fine elastic thread for sewing machine
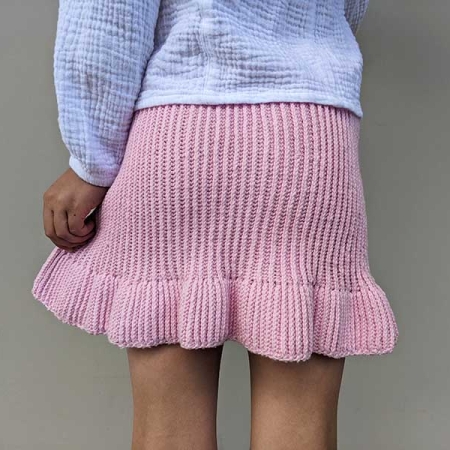
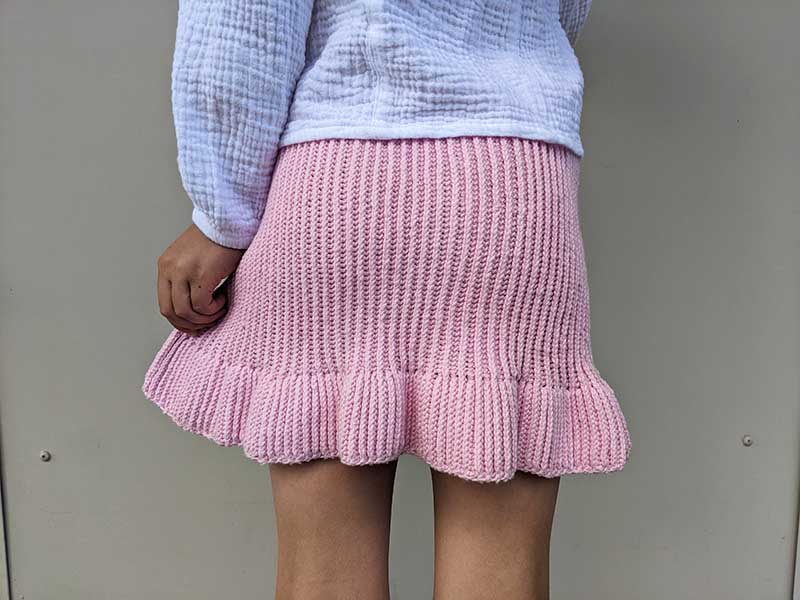
Crochet summer skirt size:
My measurement (fits 5-8 years old):
Waist – 62 cm
Hips – 64 cm
Skirt length – 31 cm
Gauge: 28 sts x 32 rows = 10 cm/4 in. Worked in front post single crochet only
Children’s Size Chart (calculation formula is included in the ads-free version of the pattern)
| Child’s Height, cm | 80-86 | 92-98 | 104-110 | 116-122 | 128 | 134 | 140 | 146 | 152 |
| Waist,cm | 53 | 55 | 56 | 58 | 59 | 61 | 62 | 65 | 68 |
| Hips,cm | 57 | 61 | 63 | 67 | 71 | 73 | 76 | 79 | 82 |
| Skirt length,cm | 21-23 | 22-24 | 25-27 | 28-31 | 33 | 35 | 38 | 40 | 43 |
| Waistband height, cm | 4.5 | 5 | 5.5 | 6 | 6 | 6.5 | 6.5 | 7 | 7 |
The measurements in the chart are average. Please measure the child before choosing a size.
Common abbreviations of crochet stitches (US):
ch – chain
sl st – slip stitch
SC – single crochet
FPSC – front post single crochet
st(s) – stitch(es)
VG – vertical gauge
HG – horizontal gauge
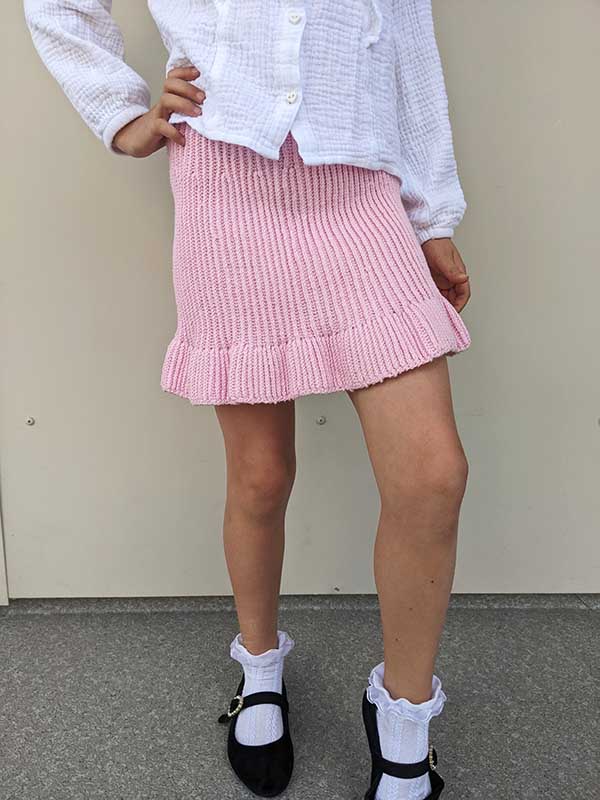
Summer skirt for girls crochet pattern:
Watch this short video tutorial on how to crochet a swatch, then measure both the horizontal and vertical gauge.
Chain 87+1.
Row 1: Working into the back ridge of each chain, sl st into the 2nd ch from the hook and into each ch across. Turn (87)
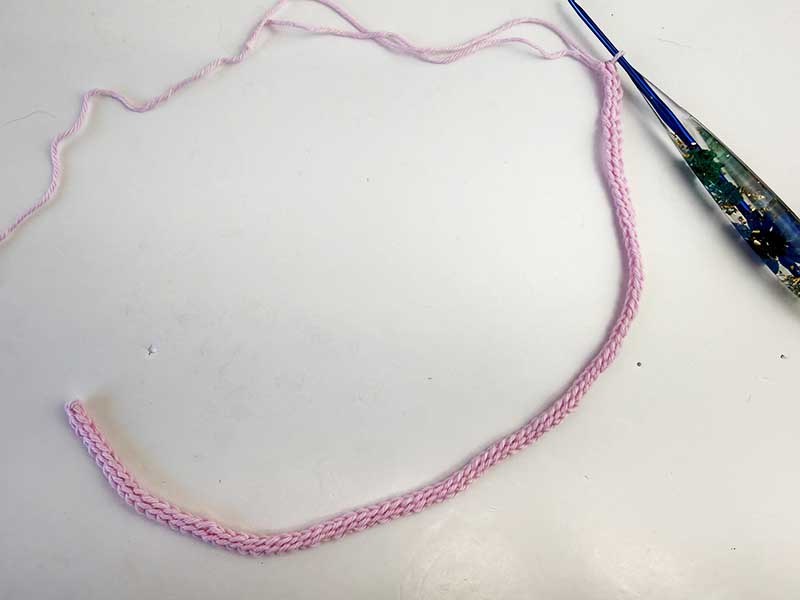
Row 2: ch 1, FPSC around each st across, then work sl st in the very last st. Turn (86 FPSC+1sl st)
Row 3 (ruffle): Turn your work so the working yarn is in front. No ch1 needed. FPSC around the next 16 sts, then work 1 SC into the following st, where your hook exits after the FPSC. (16 FPSC +1 SC)
Turn your work so the working yarn is in front. No ch1 needed. FPSC around the next 16 sts, then work sl st in the very last st. (16 FPSC + 1sl st)
Turn your work so the working yarn is in front. No ch1 needed. FPSC around the next 16 sts, sl st for smooth join, FPSC around the next 69 sts, then work 1 SC into the last stitch. (16 FPSC + 1sl st + 69FPSC + 1 SC)
Slip stitch to join the short rows smoothly: Insert your hook into the following st, working under the raised ridge created by Row 3, then insert it into the next st. Yarn over and pull through all loops on the hook to complete a sl st.
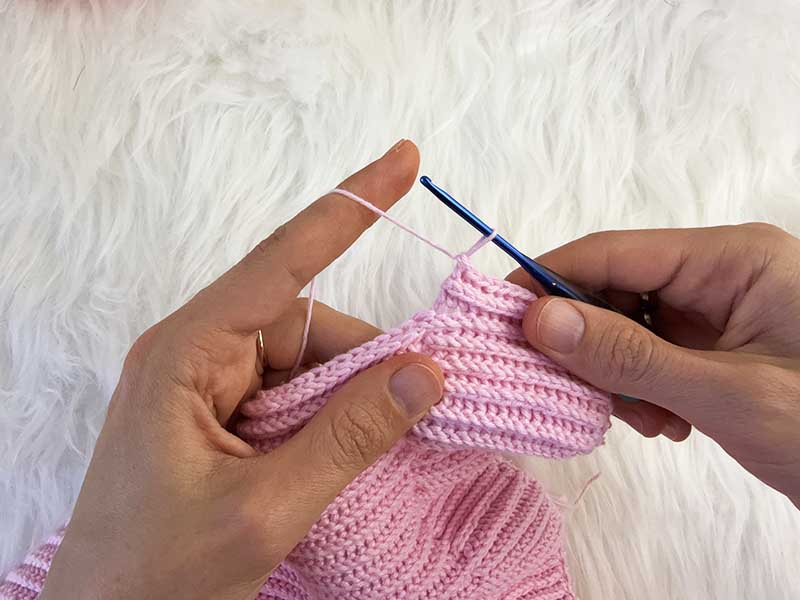
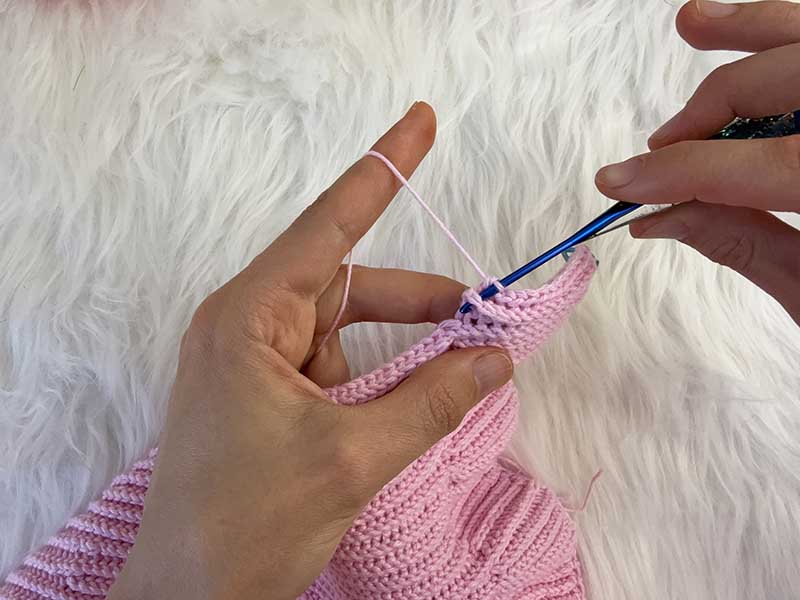
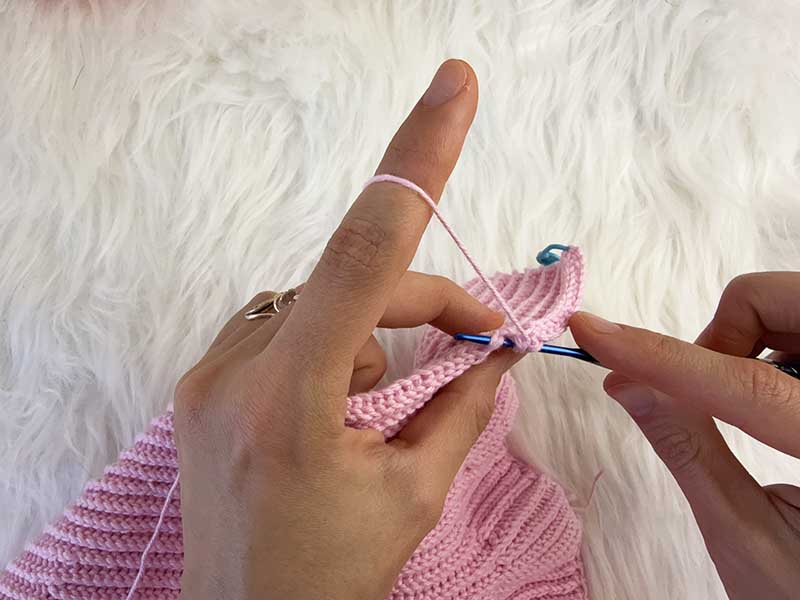
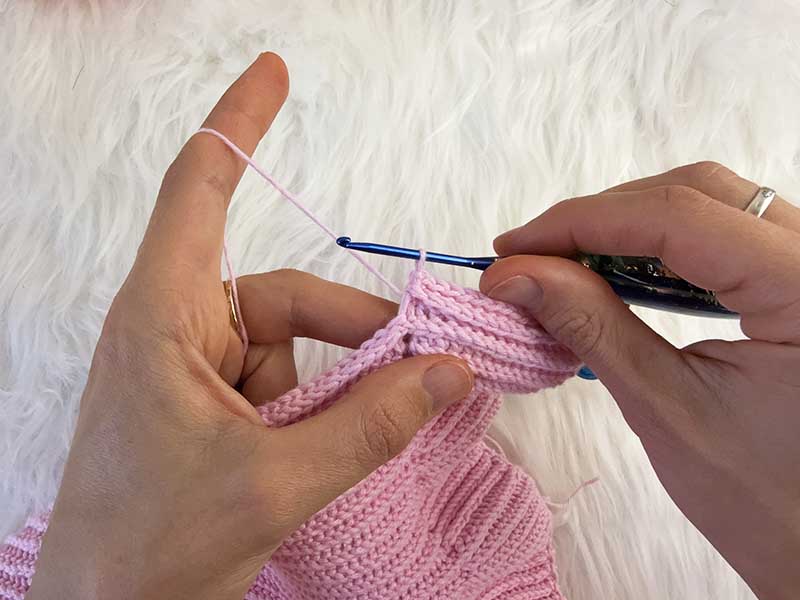
Row 4: Turn your work so the working yarn is in front. No ch1 needed. FPSC around each st across, then work sl st in the very last st. Turn (86 FPSC+1sl st)
Row 5 (ruffle): Turn your work so the working yarn is in front. No ch1 needed. FPSC around the next 16 sts, then work 1 SC into the following st, where your hook exits after the FPSC. (16 FPSC +1 SC)
Turn your work so the working yarn is in front. No ch1 needed. FPSC around the next 16 sts, then work sl st in the very last st. (16 FPSC + 1sl st)
Turn your work so the working yarn is in front. No ch1 needed. FPSC around the next 16 sts, sl st for smooth join, FPSC around the next 69 sts, then work 1 SC into the last stitch. (16 FPSC + 1sl st + 69FPSC + 1 SC)
Row 6: Turn your work so the working yarn is in front. No ch1 needed. FPSC around each st across, then work sl st in the very last st. Turn (86 FPSC+1sl st)
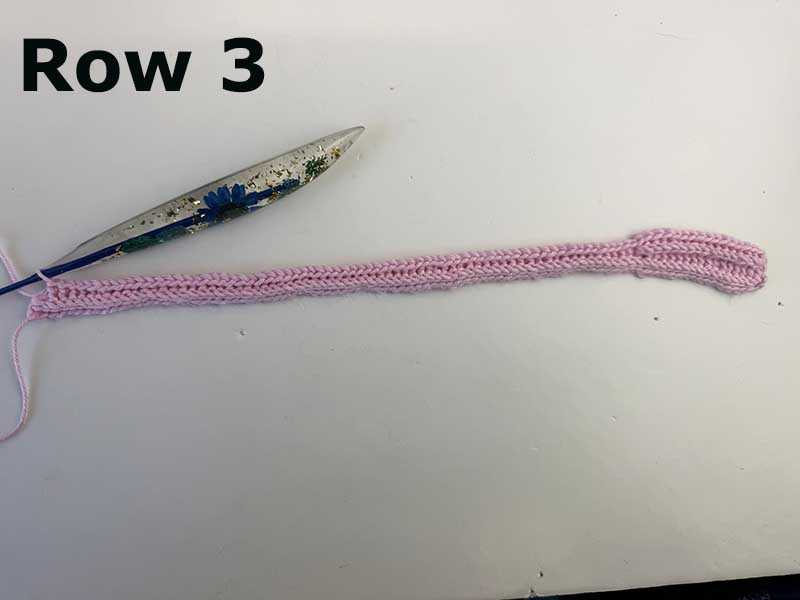
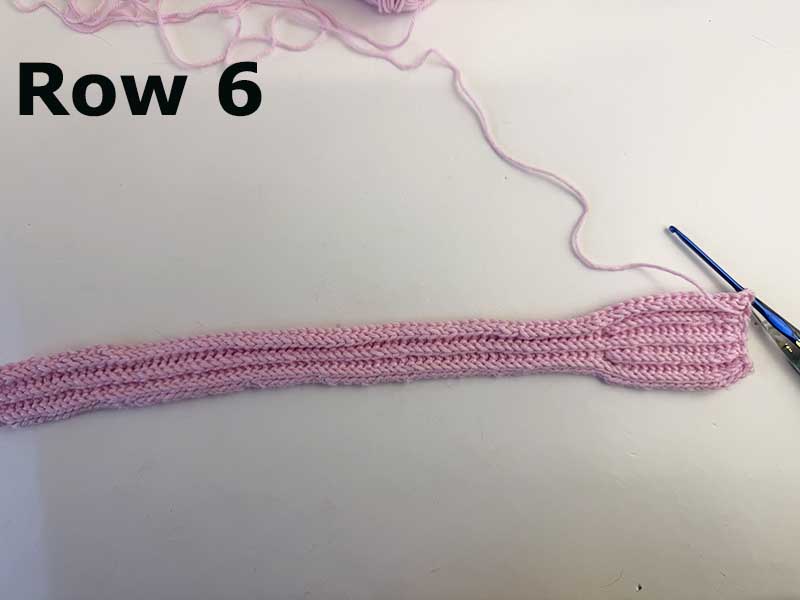
Row 7 (riffle): Repeat Row 5.
Row 8: Turn your work so the working yarn is in front. No ch1 needed. FPSC around each st across, then work sl st in the very last st. Turn (86 FPSC+1sl st)
Row 9 (ruffle and waistband): Turn your work so the working yarn is in front. No ch1 needed. FPSC around the next 16 sts, then work 1 SC into the following st, where your hook exits after the FPSC. (16 FPSC +1 SC)
Turn your work so the working yarn is in front. No ch1 needed. FPSC around the next 16 sts, then work sl st in the very last st. (16 FPSC + 1sl st)
Turn your work so the working yarn is in front. No ch1 needed. FPSC around the next 16 sts, sl st for smooth join, FPSC around the next 53 sts. (16 FPSC + 1sl st + 53FPSC)
Row 10: Turn your work so the working yarn is in front. No ch1 needed. FPSC around each st across, then work sl st in the very last st. (69 FPSC + 1sl st)
Row 11 (ruffle): Turn your work so the working yarn is in front. No ch1 needed. FPSC around the next 16 sts, then work 1 SC into the following st, where your hook exits after the FPSC. (16 FPSC +1 SC)
Turn your work so the working yarn is in front. No ch1 needed. FPSC around the next 16 sts, then work sl st in the very last st. (16 FPSC + 1sl st)
Turn your work so the working yarn is in front. No ch1 needed. FPSC around the next 16 sts, sl st for smooth join, FPSC around the next 52 sts, sl st for smooth join (Work this slip stitch into the stitch of the last FPSC from the previous row), FPSC around the next 16 sts, then work 1 SC into the last stitch. (16 FPSC + 1sl st + 52FPSC + 1sl st + 16 FPSC + 1 SC)
Row 12: Turn your work so the working yarn is in front. No ch1 needed. FPSC around each st across, then work sl st in the very last st. Turn (86 FPSC+1sl st)
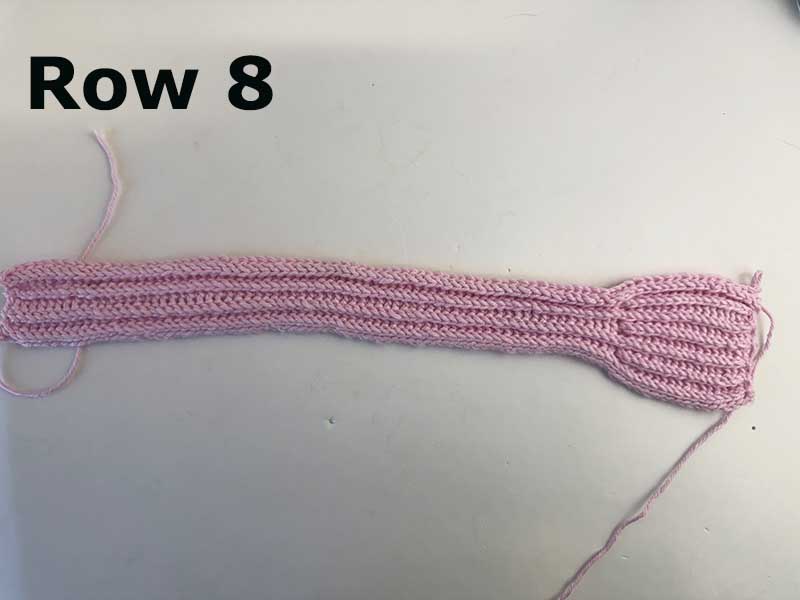
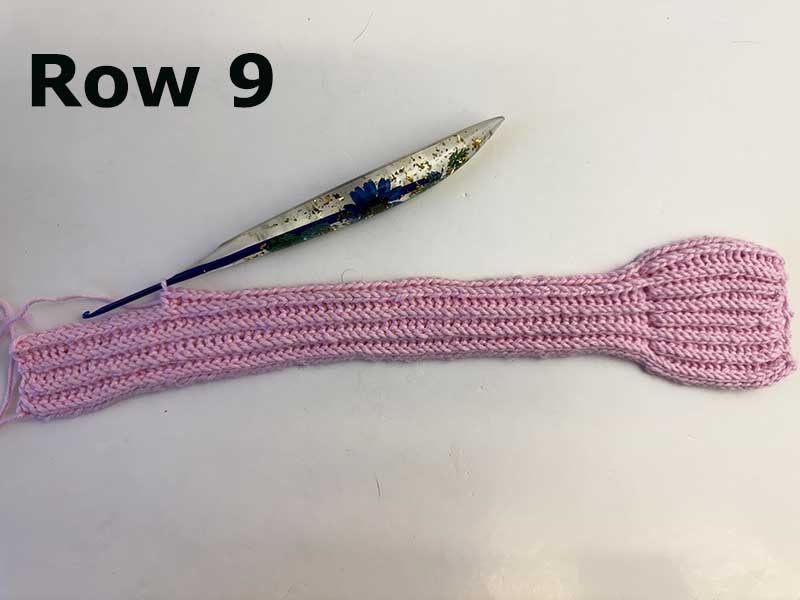
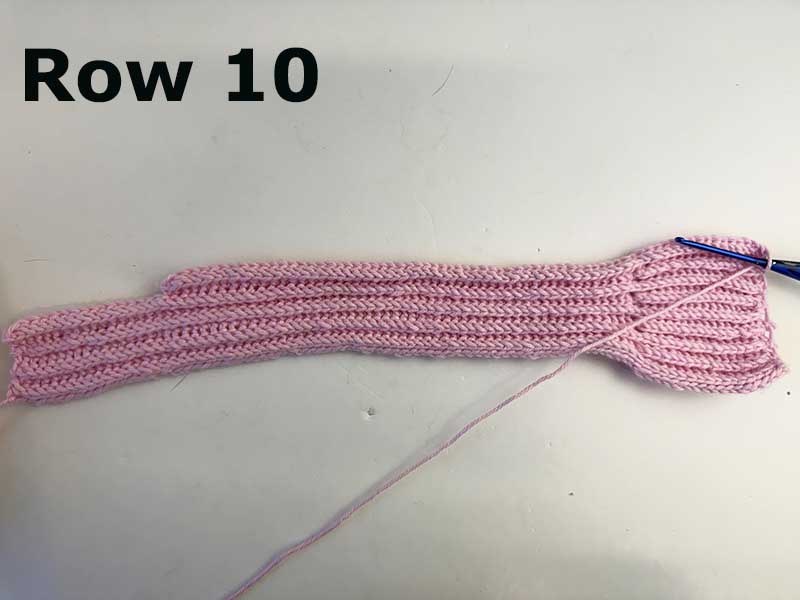
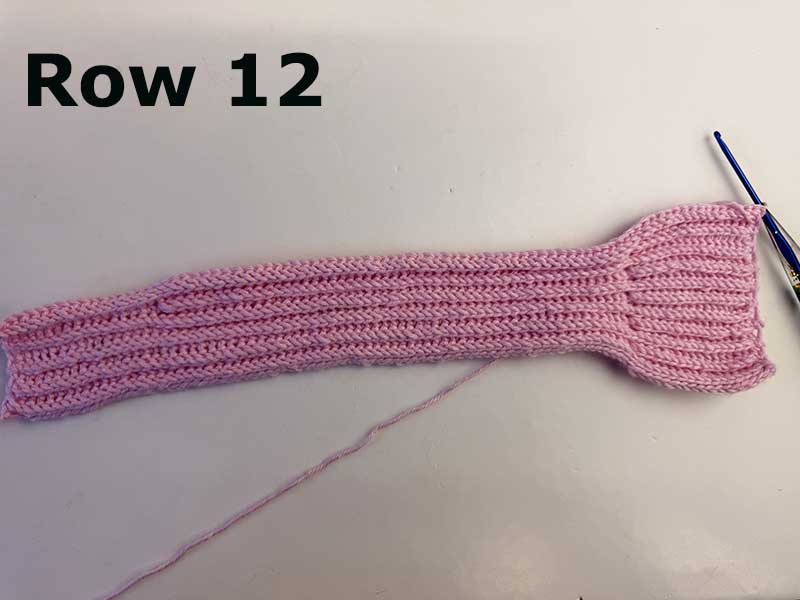
Repeat Rows 3–12 until the skirt reaches the calculated width (in cm or rows).
Seam: Crochet an even number of rows in total. Fold the skirt with the right side facing out. Chain 1. *Insert the hook through the front loop of the stitch on the side closest to you, then through the back loop of the corresponding stitch on the opposite side, yarn over and pull though all 3 loops on the hook. Repeat from * across to seam the skirt. Weave in all ends.
If you find that your skirt is slightly too wide, don’t worry, there’s an easy fix. Using a 0.6 mm fine elastic sewing thread, you can easily adjust the fit. Please refer to the video tutorial for detailed instructions.


Leave a Reply
Want to join the discussion?Feel free to contribute!