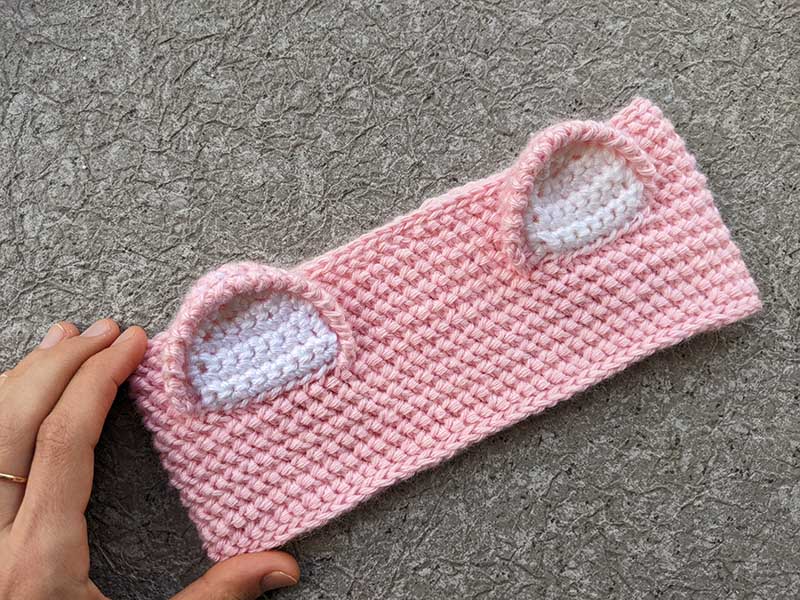
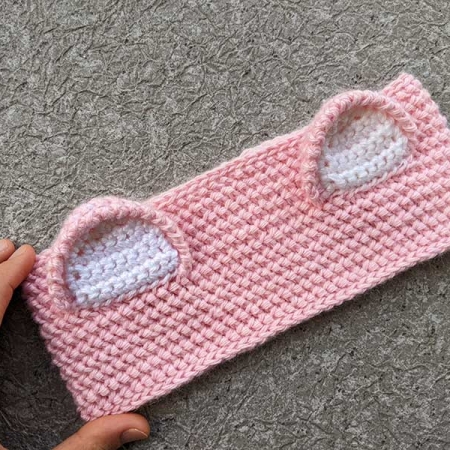
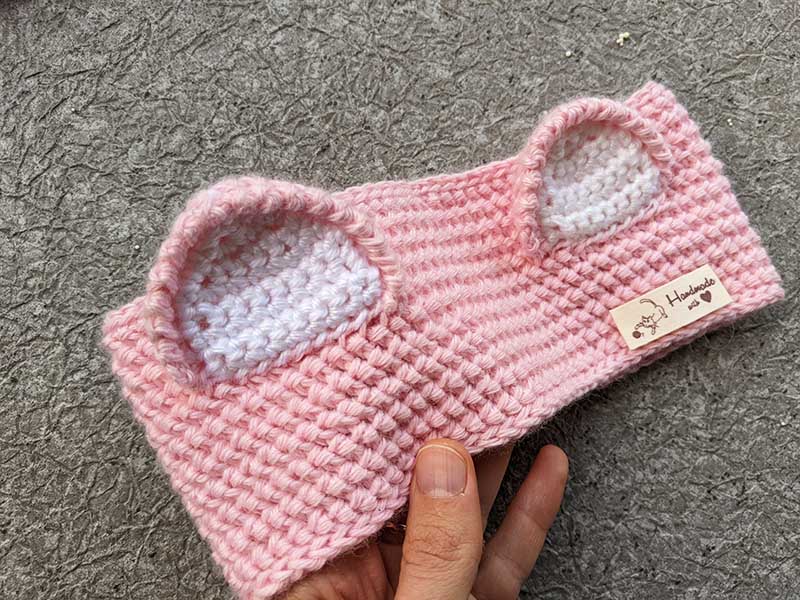
Crochet Kitty Ears Headband Pattern
Pattern Sections
Crochet tools and materials:
Crochet hook 4 mm for the headband, 3.5 mm for the ears.
Gazzal, Baby wool XL 40% Lana Merino, 20% Cashmere Pa, 40% acrylic. 50 grams -100 m per skein. Pink and white colors.
Weight Category – 4 or 3 (Medium). Quantity – 40-45 grams. If you have difficulty finding the aforementioned brand of yarn, use something else that will have about 200 m (210 yards) per 100 grams skein.
Yarn needle.

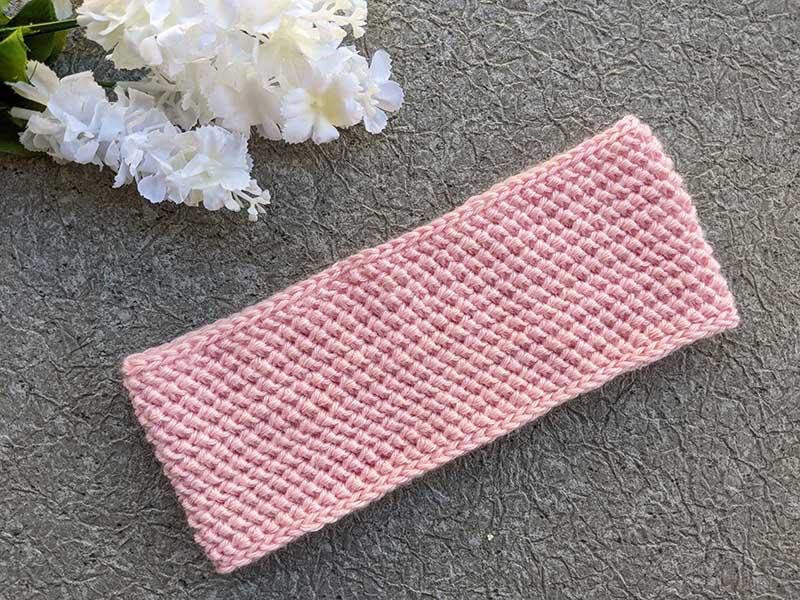
Kitty ears headband size:
Gauge: 18 stitches = 10 cm (4 inches);
15 rows = 10 cm (4 inches).
Headband’s width: 9 cm
Common abbreviations of crochet stitches:
ch – chain
sl st – slip stitch
SC – single crochet
HDC sh -Yarn over, insert the hook into the next stitch, yarn over again, pull through the stitch and the first yarn over simultaneously, resulting in two loops on the hook. Yarn over again and pull through both loops on the hook.
st(s) – stitch(es)
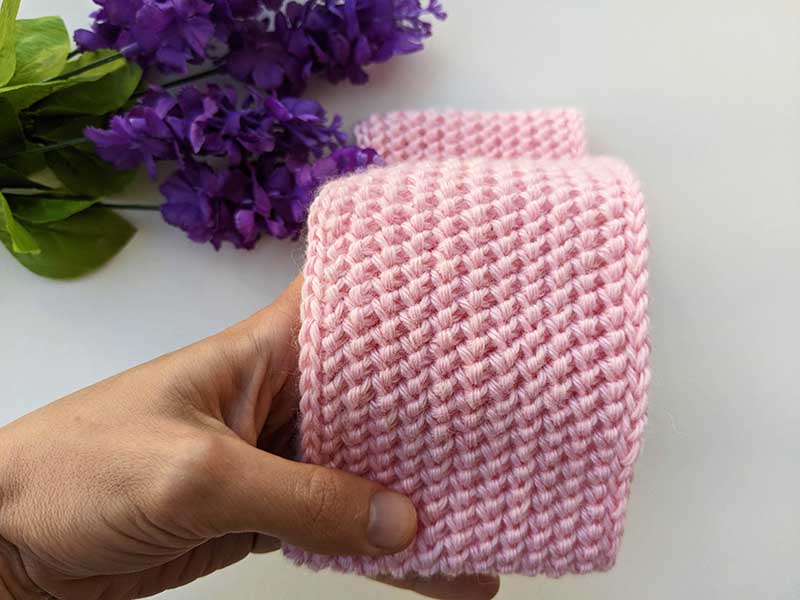
Kitty ears headband crochet pattern:
Before creating the slip knot, leave a 3-meter tail. This tail will be used later to crochet the border of the headband. Create a chain with a length such that, when stretched, it matches the circumference of the head. You can make an odd or even number of chains.
Join with a slip stitch in the first chain, ensuring the chain is not twisted.
Round 1: ch 2, HDC sh in next chain and all other chains around. Sl st to top od starting ch 2.
Round 2: ch 2: HDC sh in next st and all other stitches around. Sl st to top od starting ch 2.
Repeat Round 2 until the headband reaches the desired width. In my gauge, I completed a total of 11 rounds.
Round 12 (border): sl st in each stitch around. Join.
Return to the initial tail or attach a new one, then repeat a slip stitch in each stitch of the first round.
Crochet kitty ear outside (make 2)
Switch to a smaller hook size.
Row 1: Using main color ch 2, 2 SC in 2nd ch from hook. Turn.
Row 2: ch 1, 2 SC in next 2 stitches. Turn.
Row 3: ch 1, 2 SC in 1st st, SC in next 2 stitches, 2 SC in last st. Turn.
Row 4: ch 1, 2 SC in 1st st, SC in next 4 stitches, 2 SC in last st. Turn.
Rows 5 -8: ch 1, SC in next 8 sts.
SC around the 2 sides of the ear. Make 2 single crochet stitches in the top corner. Do not cut the yarn.
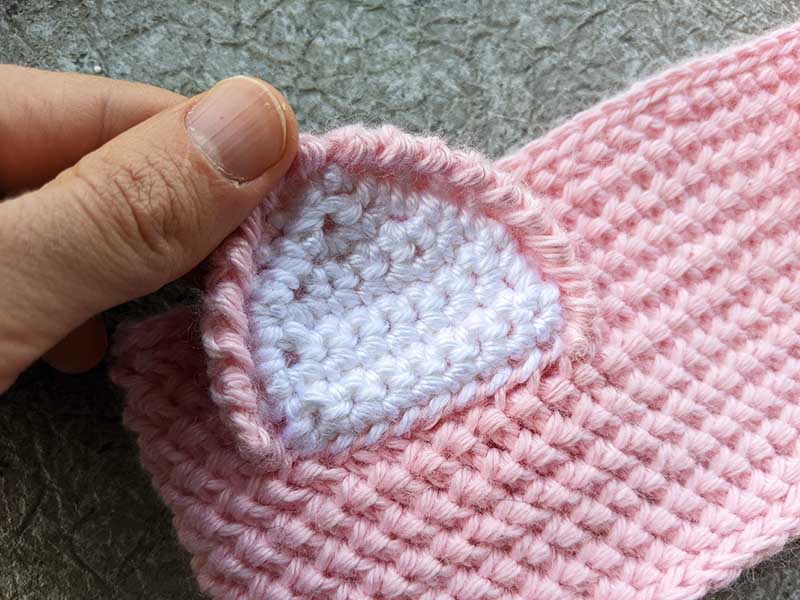
Crochet kitty ear inside (make 2)
Repeat the same steps with the white color for the inner ear. Fasten off.
Place the inner ear color over the outer ear color. Proceed to single crochet around the edges of the ears, utilizing the outer ear color. Optionally, you can add a crab stitch around the edge of the ear at the end. Fasten off, leaving an extended tail for sewing.
Position your ears on the headband where you desire, then secure them in place with pins. Once you’ve arranged them to your liking, use a yarn needle to sew them onto the headband. How you sew them can influence the final appearance of your headband or hat.


Leave a Reply
Want to join the discussion?Feel free to contribute!