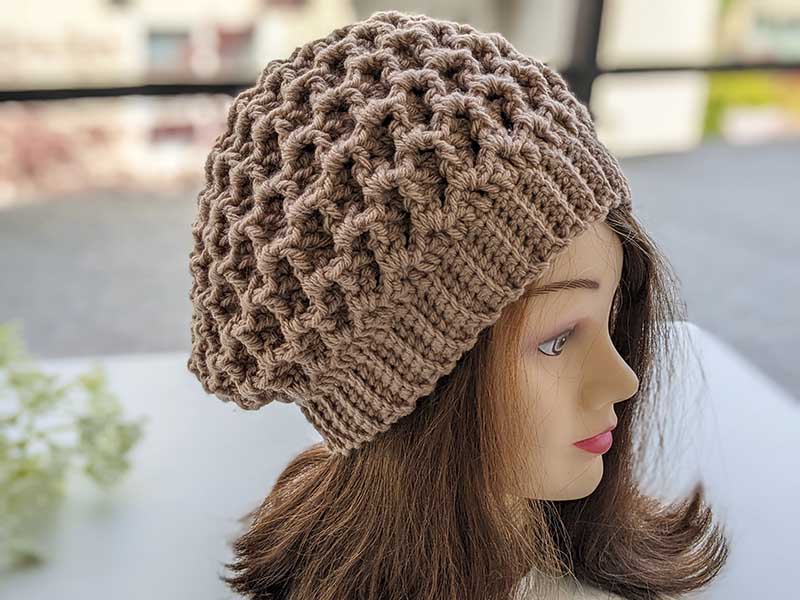
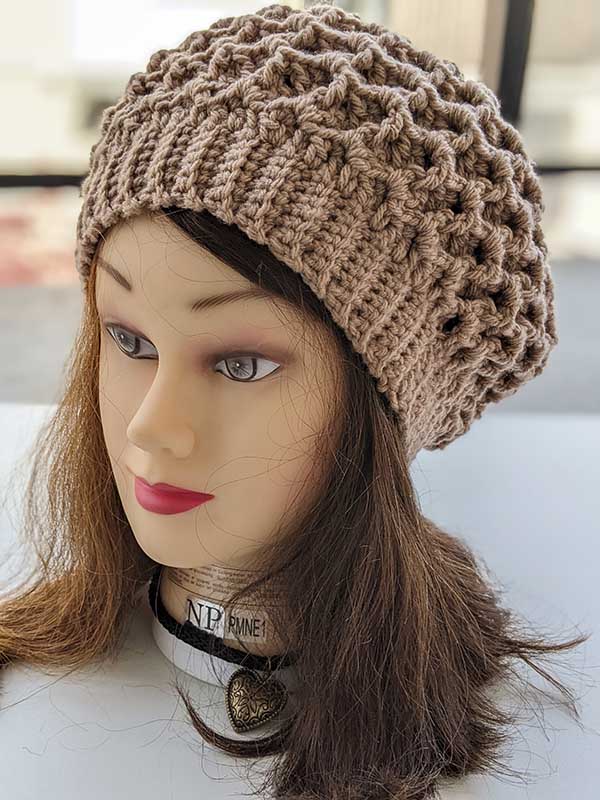
Crochet Classic Beret Pattern
Pattern Sections
Crochet materials and tools:
Crochet Hook 4 mm for the ribbing and 5 mm for the main part. Alternatively, you can use a 4.5 mm hook or continue with the 4 mm hook for the main part.;
Loops&Threads, Impeccable (Medium) – 100% acrylic. 127.5 grams – 260 meters per skein. Quantity – 100-110 grams
Crochet classic beret size:
Head circumference: This hat is one-size-fits-most and should comfortably fit a head circumference of up to 23 inches.
Gauge: 17 stitches = 4 inches
Common abbreviations of crochet stitches (US):
ch – chain
SC blo – single crochet back loop only
SC – single crochet
DC – double crochet
sl st – slip stitch
WS – wrong side
RS – right side
FPSC – front post single crochet
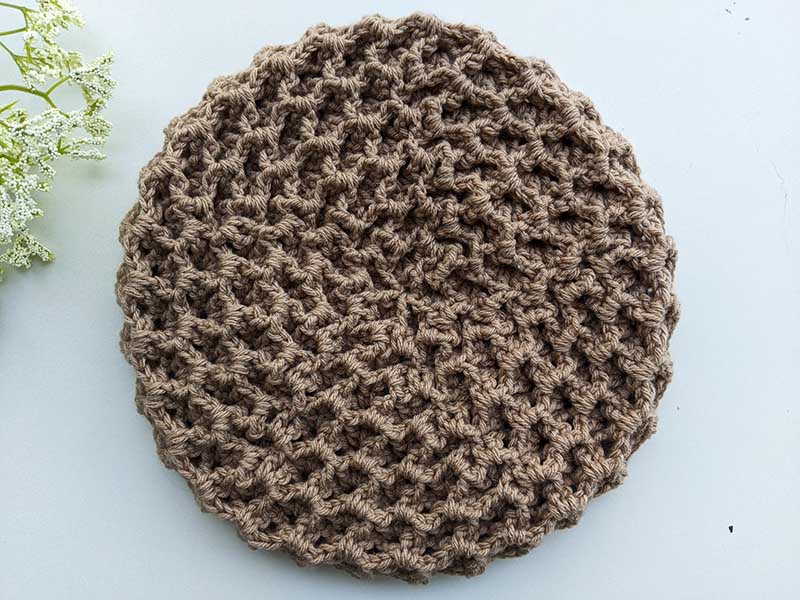
Classic beret crochet pattern:
Row 1: Ch 8, sc in 2nd ch from hook and across, turn (7).
Rows 2-75: ch1, SC blo in each st across, turn (7). Optionally crochet the last SC underneath both loops to reduce the stretchiness of the edge.
My ribbing measures about 47 cm. Do not change the number of rows for the ribbing part. Instead, change the hook size or the yarn weight if needed.
Join the last row and the first one: *Insert the hook through the chain of the first row and underneath both loops of the fabric on the other side, yarn over, and pull it through both loops and stitch on the hook. Repeat from * until the end. Turn the ribbing right side out and work into the ends of the SC rows on the ribbing.
Change to a bigger size crochet hook.
Round 1 (RS): ch 3(count as DC), DC in next st, *SC in next st, ch 2, 2 DC in next stitch, SC in next st, ch 2, DC in next 2 sts. Repeat from * around. SC in next st, ch 2, 2 DC in next stitch, SC in next st, ch 2, join around beginning ch-3. Turn your work clockwise.
Round 2 (WS): SC in ch-2 sp, ch 2 (count SC+ch2 as DC), DC in same ch-2 sp, * skip next SC and DC, FPSC around next DC, ch 2, 2 DC in next ch-2 sp. Repeat from * around. Skip next SC and DC, FPSC around ch 3 of previous round, ch 2, join with sl st between beginning ch-3 and next DC. Turn your work clockwise.
Round 3 (RS): SC in ch-2 sp, ch 2 (count SC+ch2 as DC), DC in same ch-2 sp, * skip next FPSC and DC, FPSC around next DC, ch 2, 2 DC in next ch-2 sp. Repeat from * around. Skip next FPSC and DC, FPSC around SC+ch 2 of previous round, ch 2, join with sl st between beginning first two DC. Turn your work clockwise.
Repeat Round 3 until the beret reaches approximately 11 cm. I have completed a total of 10 rounds.
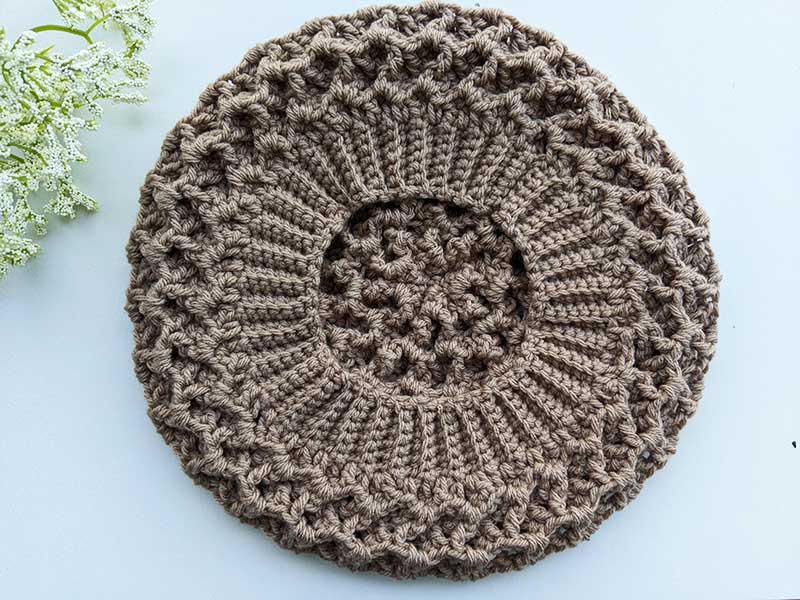
Shaping the crown of the crochet beret:
Round 1(RS):
-
- SC in the ch-2 space, ch 2 (this counts as a DC), DC in the same ch-2 space. *Skip the next FPSC and DC. Insert the hook around the post of the next DC. Then skip the next FPSC and DC again, and insert the hook around the post of the following DC.
- Finish with FPSC, ch 2, 2 DC in the next ch-2 space.
- [Skip the next FPSC and DC, FPSC around the next DC, ch 2, 2 DC in the next ch-2 space] – repeat this sequence 4 times.
- Repeat from * around.
- Finish with sl st between the beginning first two DC. Turn your work clockwise.
Round 2 (WS): Repeat Round 3 of the main part.
Round 3 (RS): Round 3 will be the same as Round 1 of decreases, the only difference being that the sequence described in the 3rd step will be repeated 3 times instead of 4.
Round 4 (WS): Repeat Round 3 of the main part.
Round 5 (RS): Round 5 will be the same as Round 1 of decreases, the only difference being that the sequence described in the 3rd step will be repeated twice.
Round 6 (WS): Repeat Round 3 of the main part.
Round 7 (RS): Round 7 will be the same as Round 1 of decreases, the only difference being that the sequence described in the 3rd step will be repeated once.
Round 8 (WS): Repeat Round 3 of the main part.
Round 9 (RS): SC in the ch-2 space, ch 2 (this counts as a DC), DC in the same ch-2 space. *Skip the next FPSC and DC. Insert the hook around the post of the next DC. Then skip the next FPSC and DC again, and insert the hook around the post of the following DC. Finish with FPSC, ch 2, 2 DC in the next ch-2 space. Repeat from * around. Join.
Cut the yarn, leaving a 15-20 cm tail. Thread the tail onto a tapestry needle and pull it through each ch-2 space of the last round. Pull tight to close the crown. Weave in the ends securely. Your beret is now complete and ready to wear.


Leave a Reply
Want to join the discussion?Feel free to contribute!