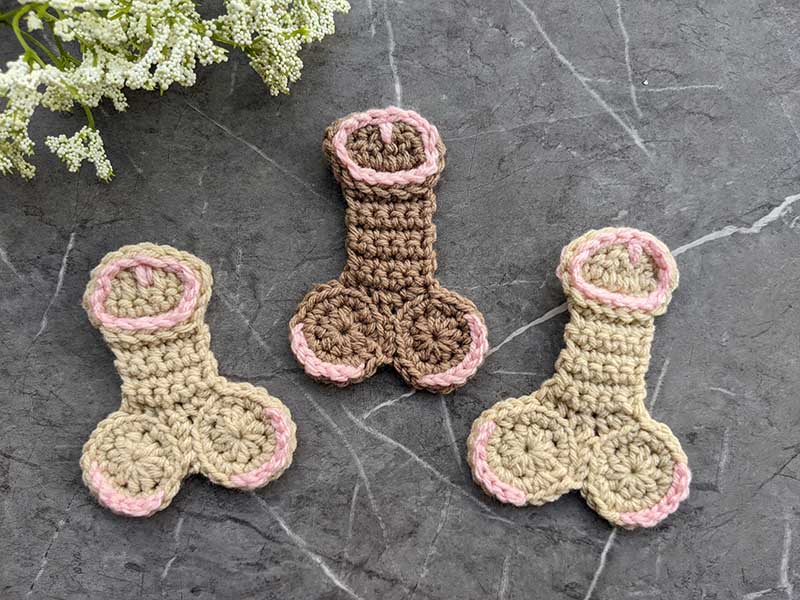
Crochet Decor Willy Pattern
Pattern Sections

Crochet materials and tools:
<> Crochet hook 4 mm
<> Burnat Premium, Yarnspirations – 100 % acrylic.
<> Yarn needle
Common abbreviations of crochet stitches (US):
ch – chain
SC – single crochet
SC blo – single crochet back loop only
SC2tog blo – single crochet two together back loop only: Insert the hook into the back loop of the first stitch and draw up a loop, then insert the hook into the back loop of the next stitch and draw up a loop, yarn over and pull through all 3 loops on the hook.
RS – right side
WS – wrong side
HDC – half double crochet
DC – double crochet
TR – treble crochet
sl st – slip stitch
st(s) – stitch(es)
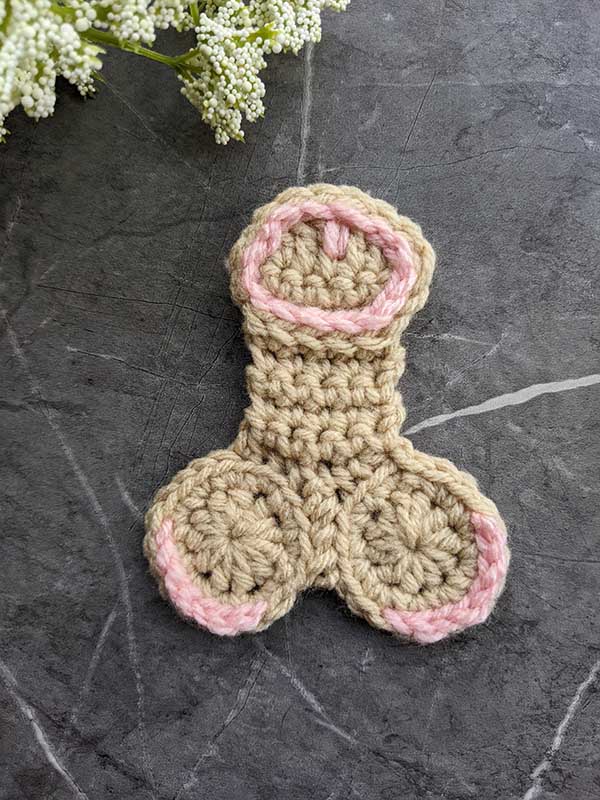
Decor willy crochet pattern:
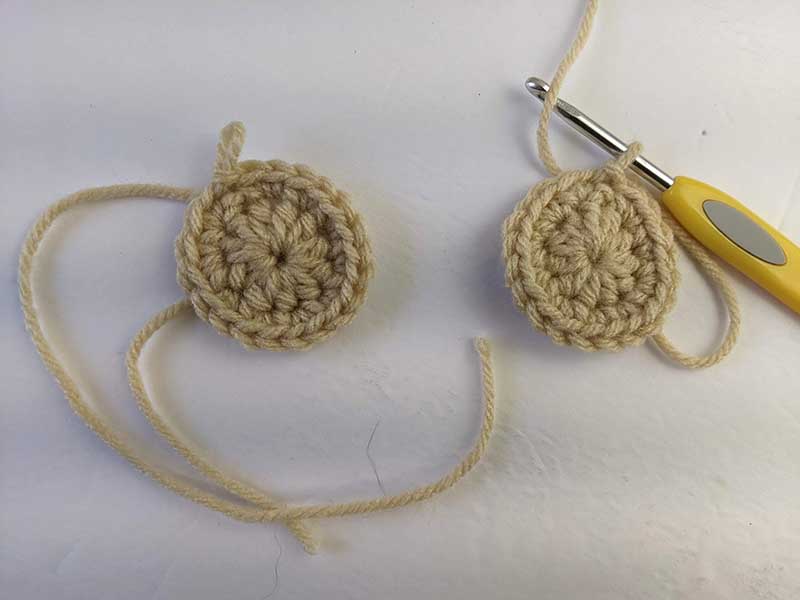
Crochet the first circle:
Round 1: Magic ring: ch 2, 10 HDC into the center of the ring. Join with sl st to the 1st HDC. (10)
Round 2: ch 1, 2 SC into the same st as join and in each stitch around. Join with sl st to the 1st SC. (20)
Cut the yarn leaving a 20 cm tail.
Crochet the second circle:
Round 1: Magic ring: ch 2, 10 HDC into the center of the ring. Join with sl st to the 1st HDC. (10)
Round 2: ch 1, 2 SC into the same st as join and in each stitch around. Join with sl st to the 1st SC. (20)

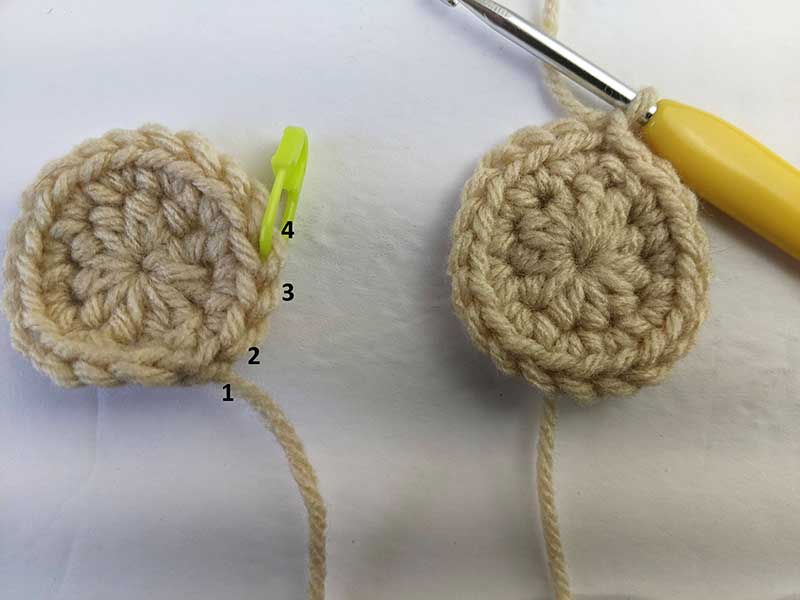
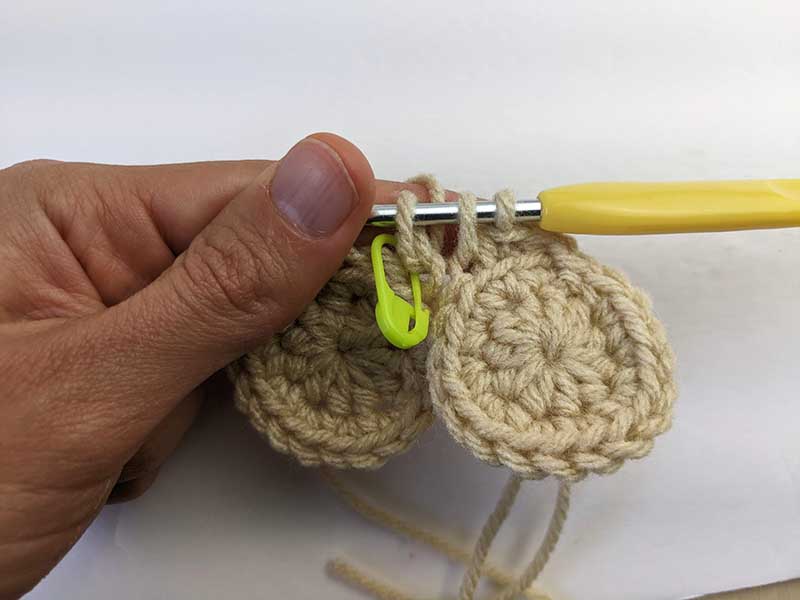
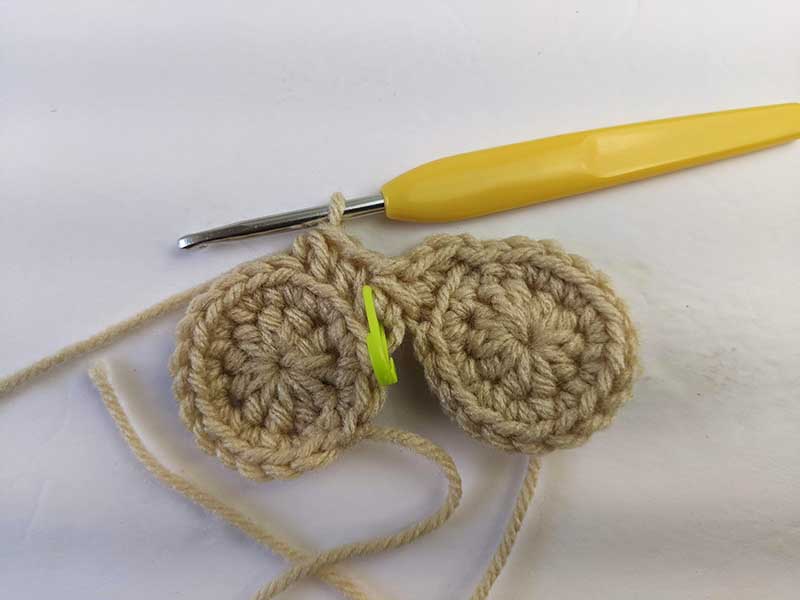
Joining both circles:
Joining circles together (Row 1): Ch 1. Work SC2tog blo starting into the same stitch as the join, then SC blo in the next stitch.
Next, insert the hook into the back loop of the following stitch and draw up a loop. Take the 1st circle (counting from the join slip stitch) and work into the back loop of its 4th stitch, then complete SC2tog blo.
Continue with SC blo in the next stitch, then SC2tog blo. Turn.
Using a yarn needle and the tail left from the first circle, weave the tail through the back loops of both circles to join them together (for more detailed instructions, see the video tutorial).
Crochet the long part:
Row 2-7: ch 1, SC in next 5 sts. Turn. (5) For the bigger size add 2 or 4 more rows.
Row 8 (WS): ch 1, 2 SC into the 1st st, SC in next 3 sts, 2 SC into the last st. Turn. (7)
Row 9 (RS): ch 1, SC into the 1st st, HDC in next st, DC in next st, TR in next st, DC in next st, HDC in next st, SC into the last st. (7)
Adding the border:
Work sl st in next 2 stitches along the edge, then into every stitch of Row 7, repeat along the edge on the other side and finish with slip stitches in each stitch of the last row, and join using a yarn needle.
Add pink slip stitches to the top and inside of the circles to create subtle shading, giving the applique more depth and a slightly rounded, realistic look, while highlighting the shape without covering the whole area. Weave in all ends.


Leave a Reply
Want to join the discussion?Feel free to contribute!